GUI Usage
Introduction
GUI Elements

As shown above, the entire interface is divided into two main parts:
The black background area on top is the display screen
The timeline with various animation labels is at the bottom
Playback Control
You can also drag the current time with the left mouse button on the timeline to adjust to the desired point
Timeline Display Range Control
You can use “WASD” to control the range displayed on the timeline
W Zoom in |
||
A Move left |
S Zoom out |
D Move right |
It feels a bit like FPS game controls
Window Position
The default window position occupies the right half of the screen, but you can change this through custom configuration
You can modify the global configuration by adding -c wnd_pos UR in the command-line parameters, for example:
janim run your_file.py YourTimeline -c wnd_pos UR
Note
The format for modifying global configuration is -c config_name value. For more configurations, see Config
UR stands for UP & RIGHT, meaning the window occupies the top-right corner of the screen
The first character indicates vertical positioning, and the second character indicates horizontal positioning
The following position characters are available (meaning described in parentheses)
U (UP) |
Top |
O |
Occupies the entire vertical length |
D (DOWN) |
Bottom |
L (LEFT) |
O |
R (RIGHT) |
Left side |
Occupies the entire horizontal length |
Right side |
Besides modifying global settings, you can also adjust timeline configurations. See Config
Advanced Features
Detailed Information
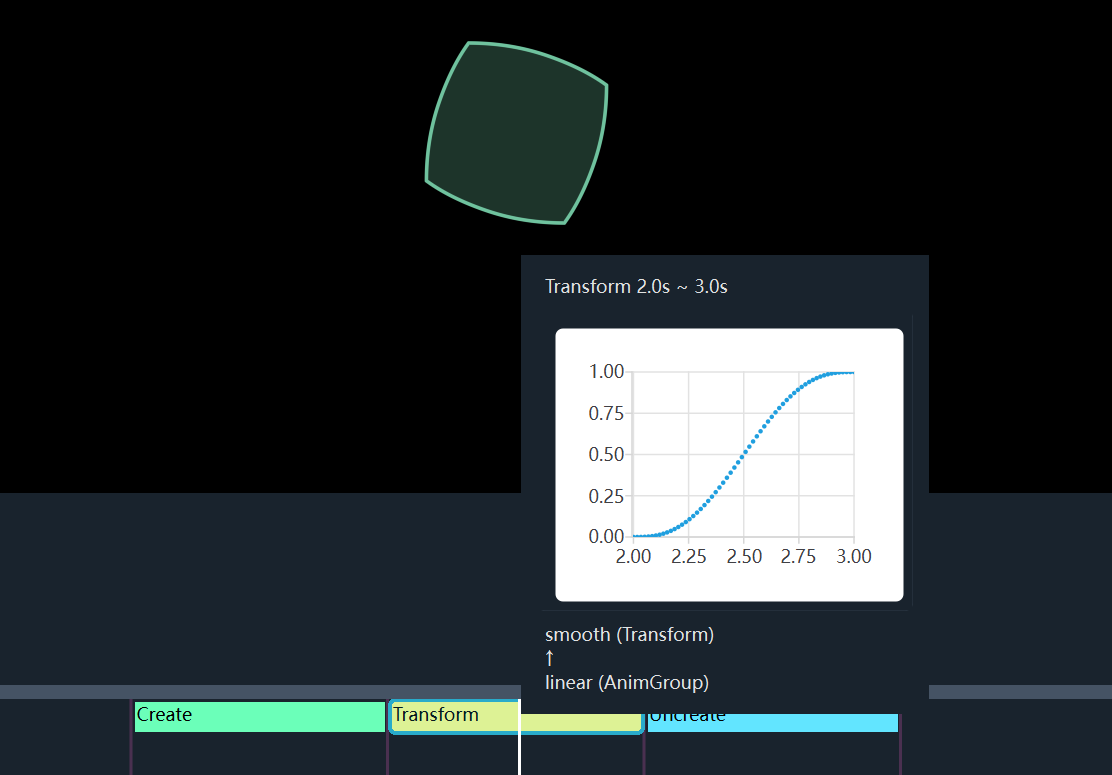
Hovering over an animation label on the timeline displays specific details, such as time-ranges and interpolation function scatter plots
VS Code Extension
You can install the janim-toolbox extension in VS Code, which provides some additional features
Rebuild: Already mentioned in Real-Time Preview; for handling multi-file rebuilds, see also
reloads()Highlight Current Line: The editor will highlight the code line corresponding to the currently playing animation.
Auto Locate: As the animation plays in the preview window, the editor will automatically locate and jump to the corresponding code line. By default, you can toggle this feature with
Ctrl+J Ctrl+A.Manual Locate: You can manually locate and jump to the current code line using
Ctrl+J Ctrl+Lby default.
Sub-item Selector
For complex items with sub-items (such as Text and TypstMath),
taking a slice can be troublesome, so the preview interface provides a sub-item selector
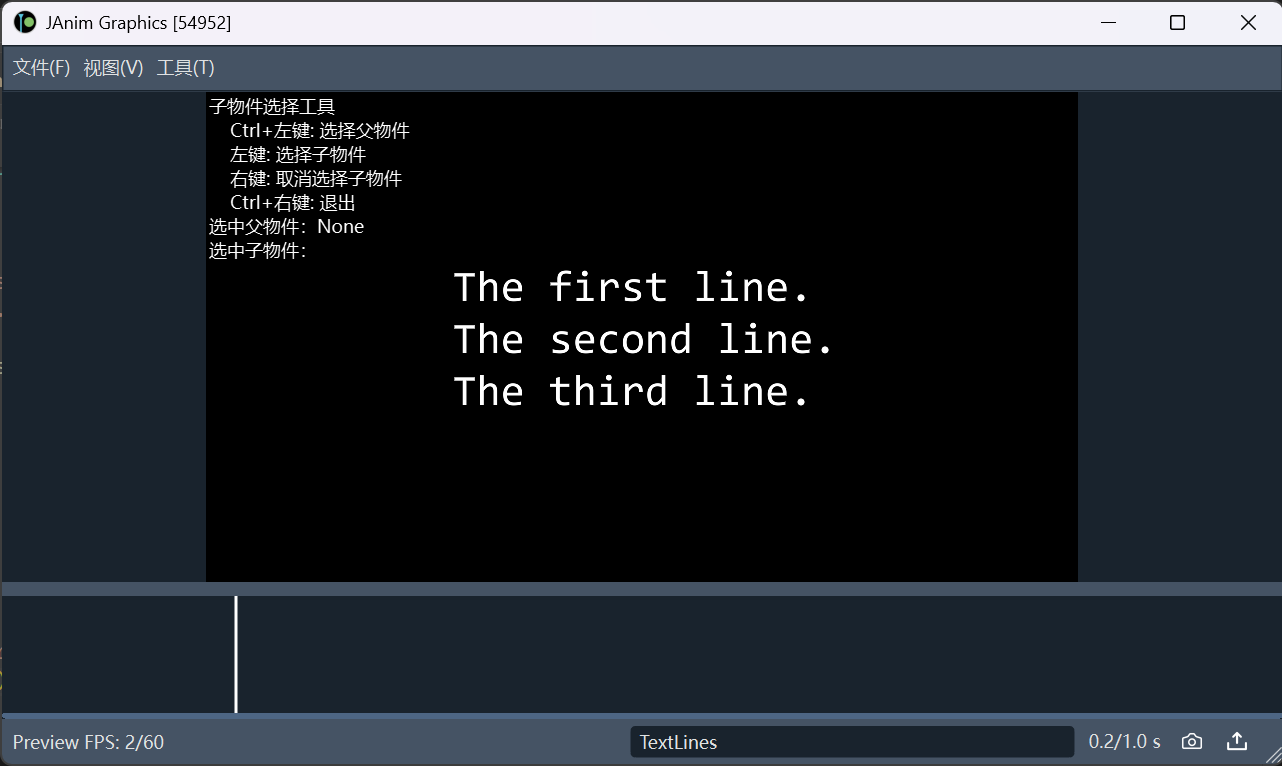
Click “Subitem Selector” in the “Tools” menu in the top-left corner of the window, and you will see content like this in the top-left:
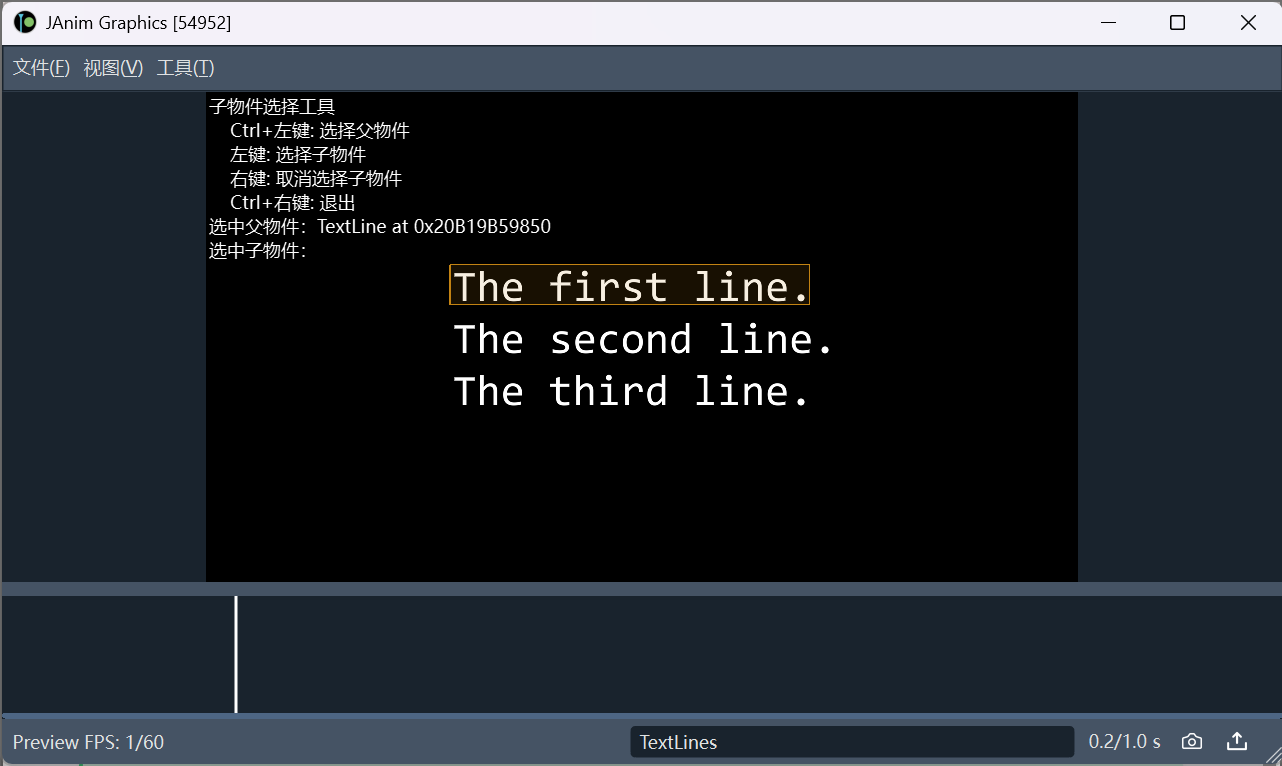
First, if we need to extract certain characters from a line of text (TextLine), we must locate this line of text. Use Ctrl + Left-click to select it.
Hint
To select a TextLine, since it is a sub-item of Text, clicking once will select the entire paragraph of text. Clicking again will select the TextLine
Once the line of text is selected, release Ctrl and directly use Left-click to select characters within the line (you can long-press and swipe to select). The top-left will display the corresponding indices
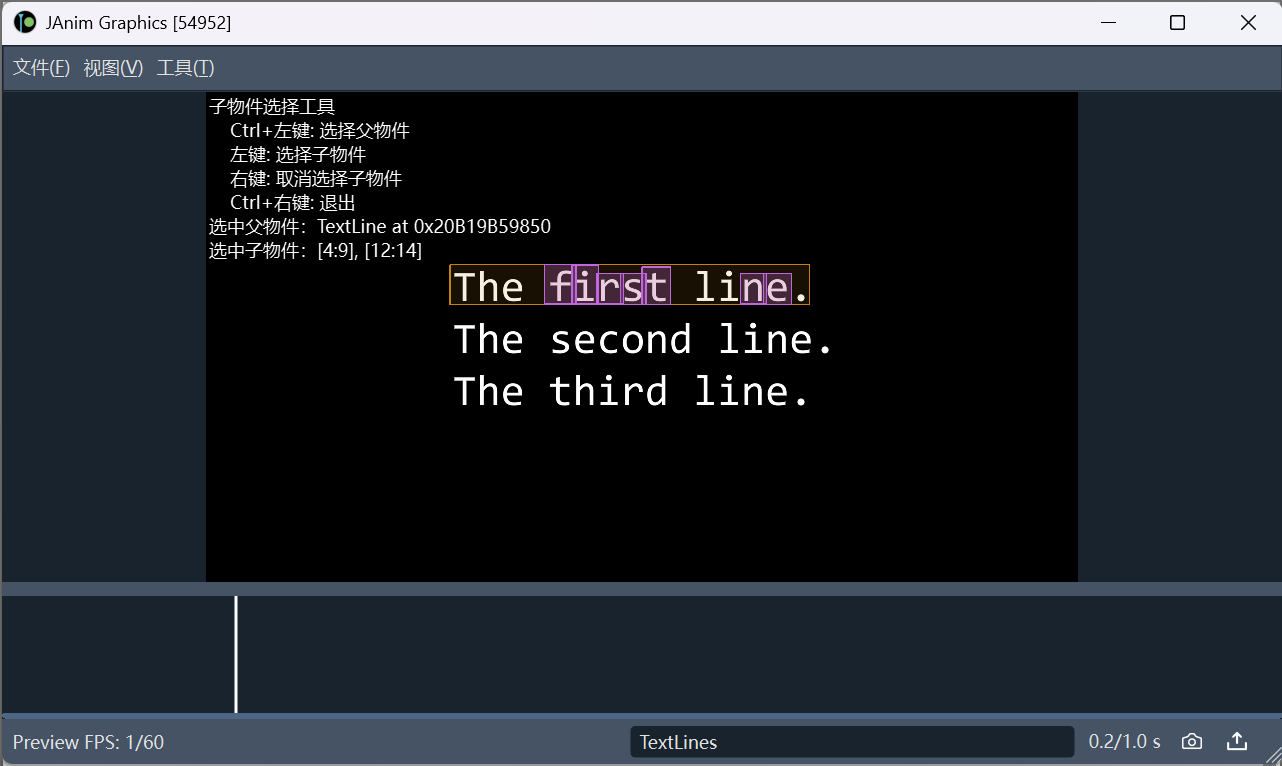
Note
Here, “first” and “ne” are selected, corresponding to slices [4:9] and [12:14]
If you selected too much, right-click to deselect
After selection, use Ctrl + Right-click to exit this function
Draw
For easy coordinate reference on the interface, a “Draw” function is provided:
Dot: After selecting, click the screen to get a coordinate in the tool window

Rect: After selecting, press down on the screen, then drag and release to create a rectangle based on the start and end point

VItem: After selecting, draw on the screen to get a curve. Typically, it has many vertices, and you can use the slider to reduce the number of points and smooth it
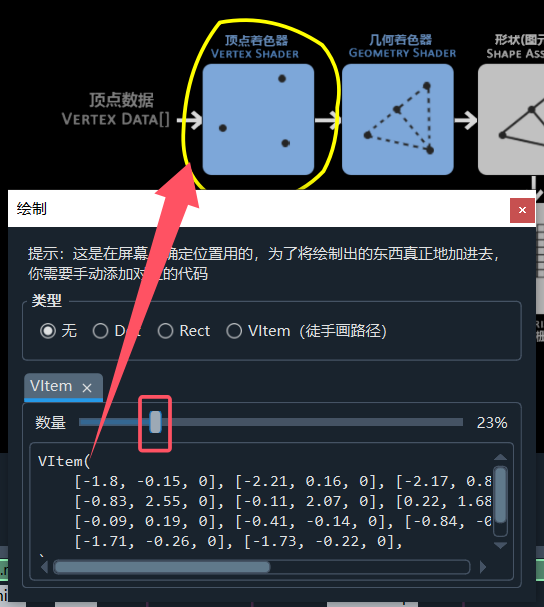
Multiple items can be created, and each will correspond to a separate page in the tool window

Warning
This is used to determine the position on the screen. To actually add the drawn content, you need to manually add the corresponding code
If no option is selected (i.e., “None”), dragging on the screen will control the position of the current page’s item
Rich Text Editing
This is a feature for editing Rich Text Format
In this editor, rich text tags are highlighted for readability
Warning
Experimental feature: Recognizing rich text format on paste
With this checkbox enabled, the editor will attempt to convert pasted HTML text styles to JAnim’s rich text style
Tip
Use janim tool richtext in the command line to open this window separately
Font List

A font index list is provided for easy font lookup
Both “Family Name” and “Full Name” can be passed to the
fontparameter ofText, for example:
Text(..., font='LXGW WenKai Lite')
Text(..., font='LXGW WenKai Lite', weight='light')
Text(..., font='LXGW WenKai Lite Light')
Utilize the search function to find fonts easily by name
Tip
Use janim tool fonts in the command line to open this window separately
Color
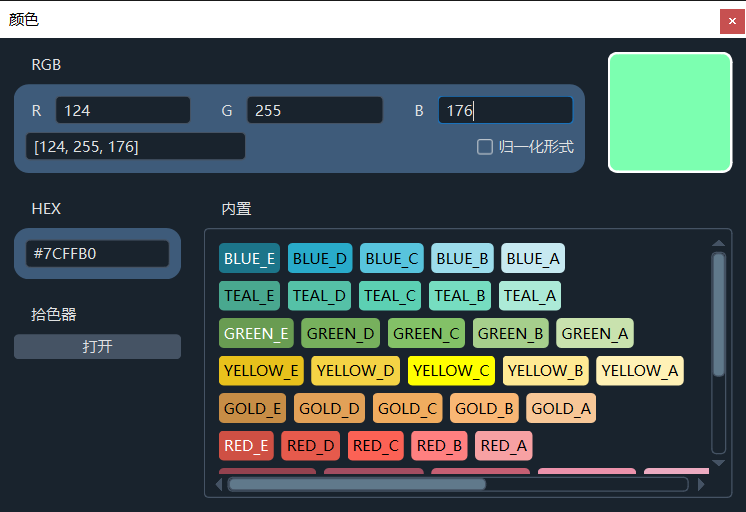
A convenient feature for color input, conversion, preview, and selection is provided
Tip
Use janim tool color in the command line to open this window separately