Coordinate System
JAnim’s coordinate system is not in pixels, but uses a coordinate range of approximately -7.11 ~ 7.11 horizontally and -4 ~ 4 vertically, forming a 16:9 frame.
The origin is at the center of the frame, with right and up as positive directions. The following figure shows the coordinate grid created on the JAnim frame and a unit circle placed at the origin:
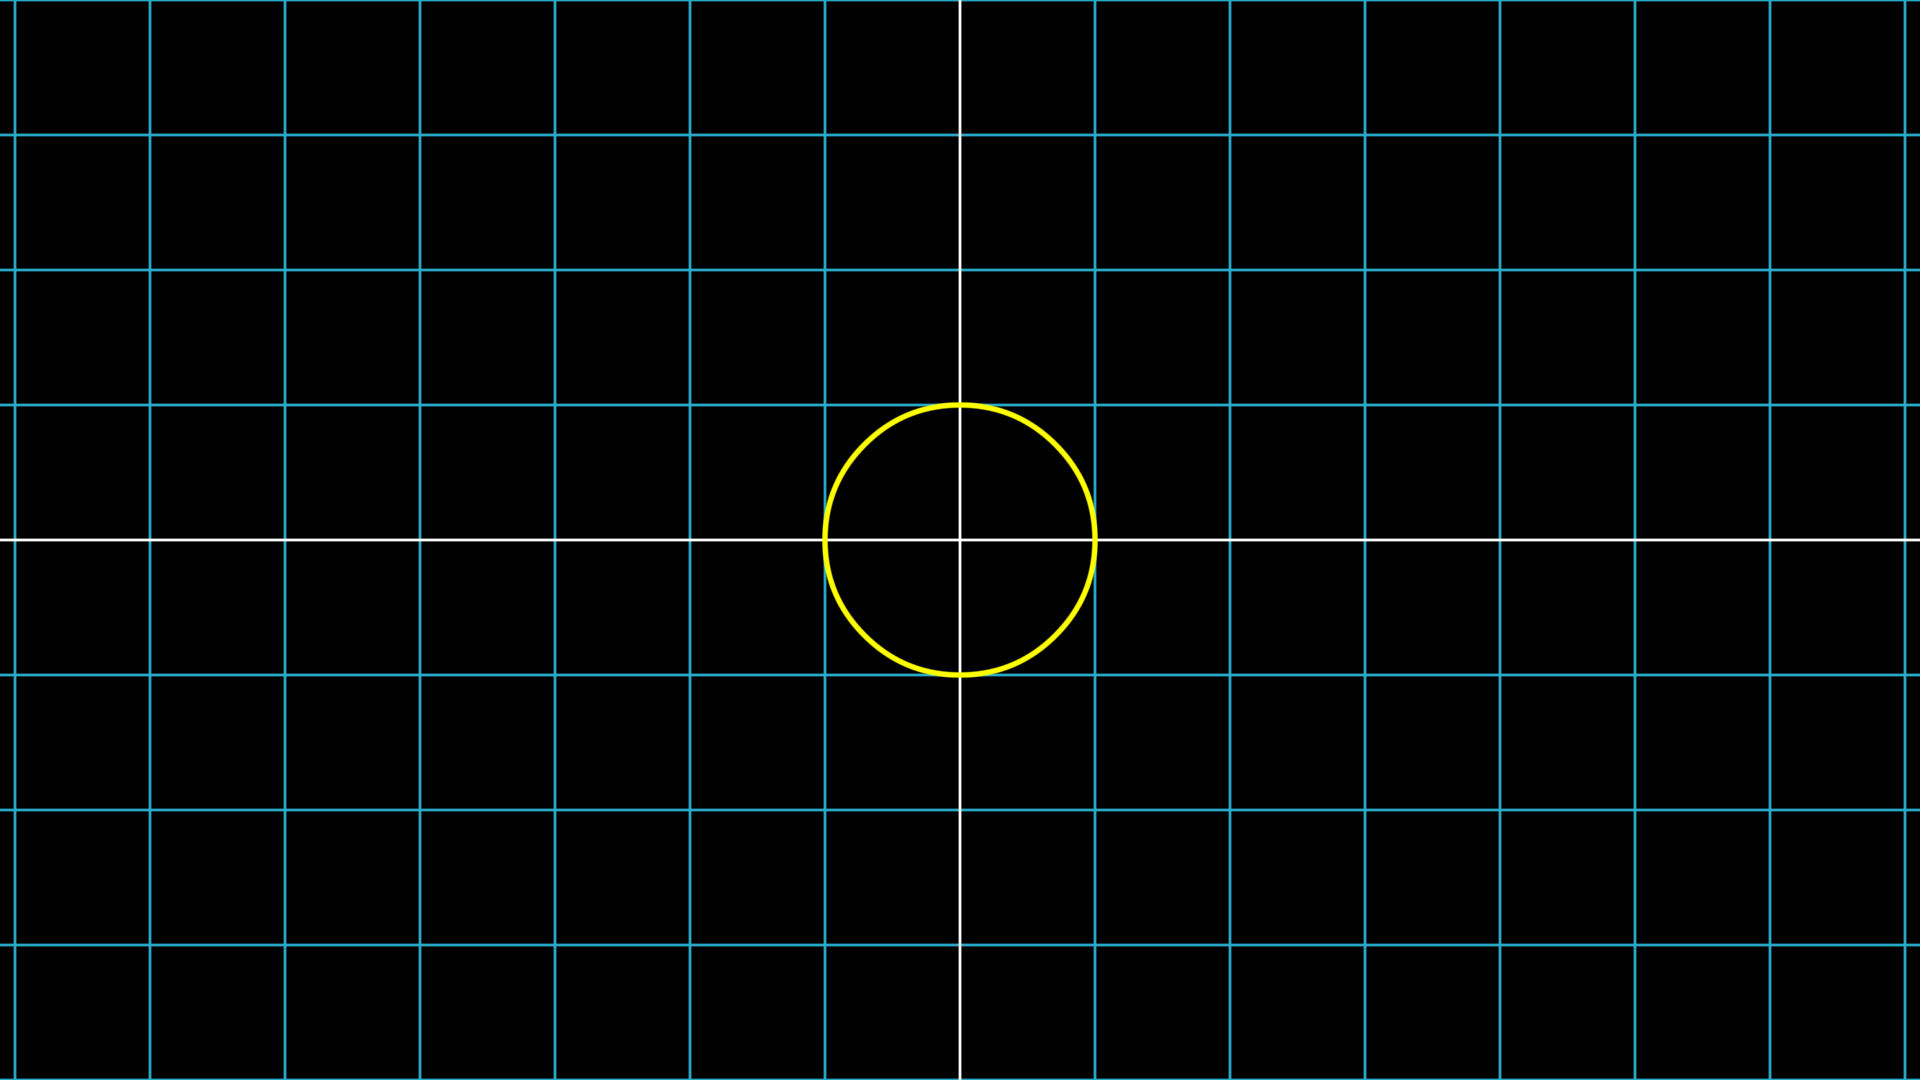
NumberPlane(faded_line_ratio=0).show()

circle = Circle(color=YELLOW).show()
Hint
Here, xxx.show() is the same as self.show(xxx), both directly display the item
Note
For convenience, the code provided here omits content outside the construct method, only showing the core part of construct
This note will not be repeated for similar cases
In the previous brief introduction, we mentioned that JAnim’s geometric items contain multiple components, including points, stroke, fill, etc.; among them, the component related to the coordinate system is points, which determines the shape and position of the item.
So in most cases, when we want to “manipulate the coordinates of an item”, we first use .points and then perform specific operations!
Coordinate Translation
The points component provides various methods to manipulate item coordinates. Here we first introduce two basic methods:
Method |
Example |
Description |
|
Translate the item according to the given displacement |
|
|
Move the item to the specified position |
For example, using .move_to(RIGHT * 3 + UP * 2) can move the item to position (3,2) in the coordinate system:
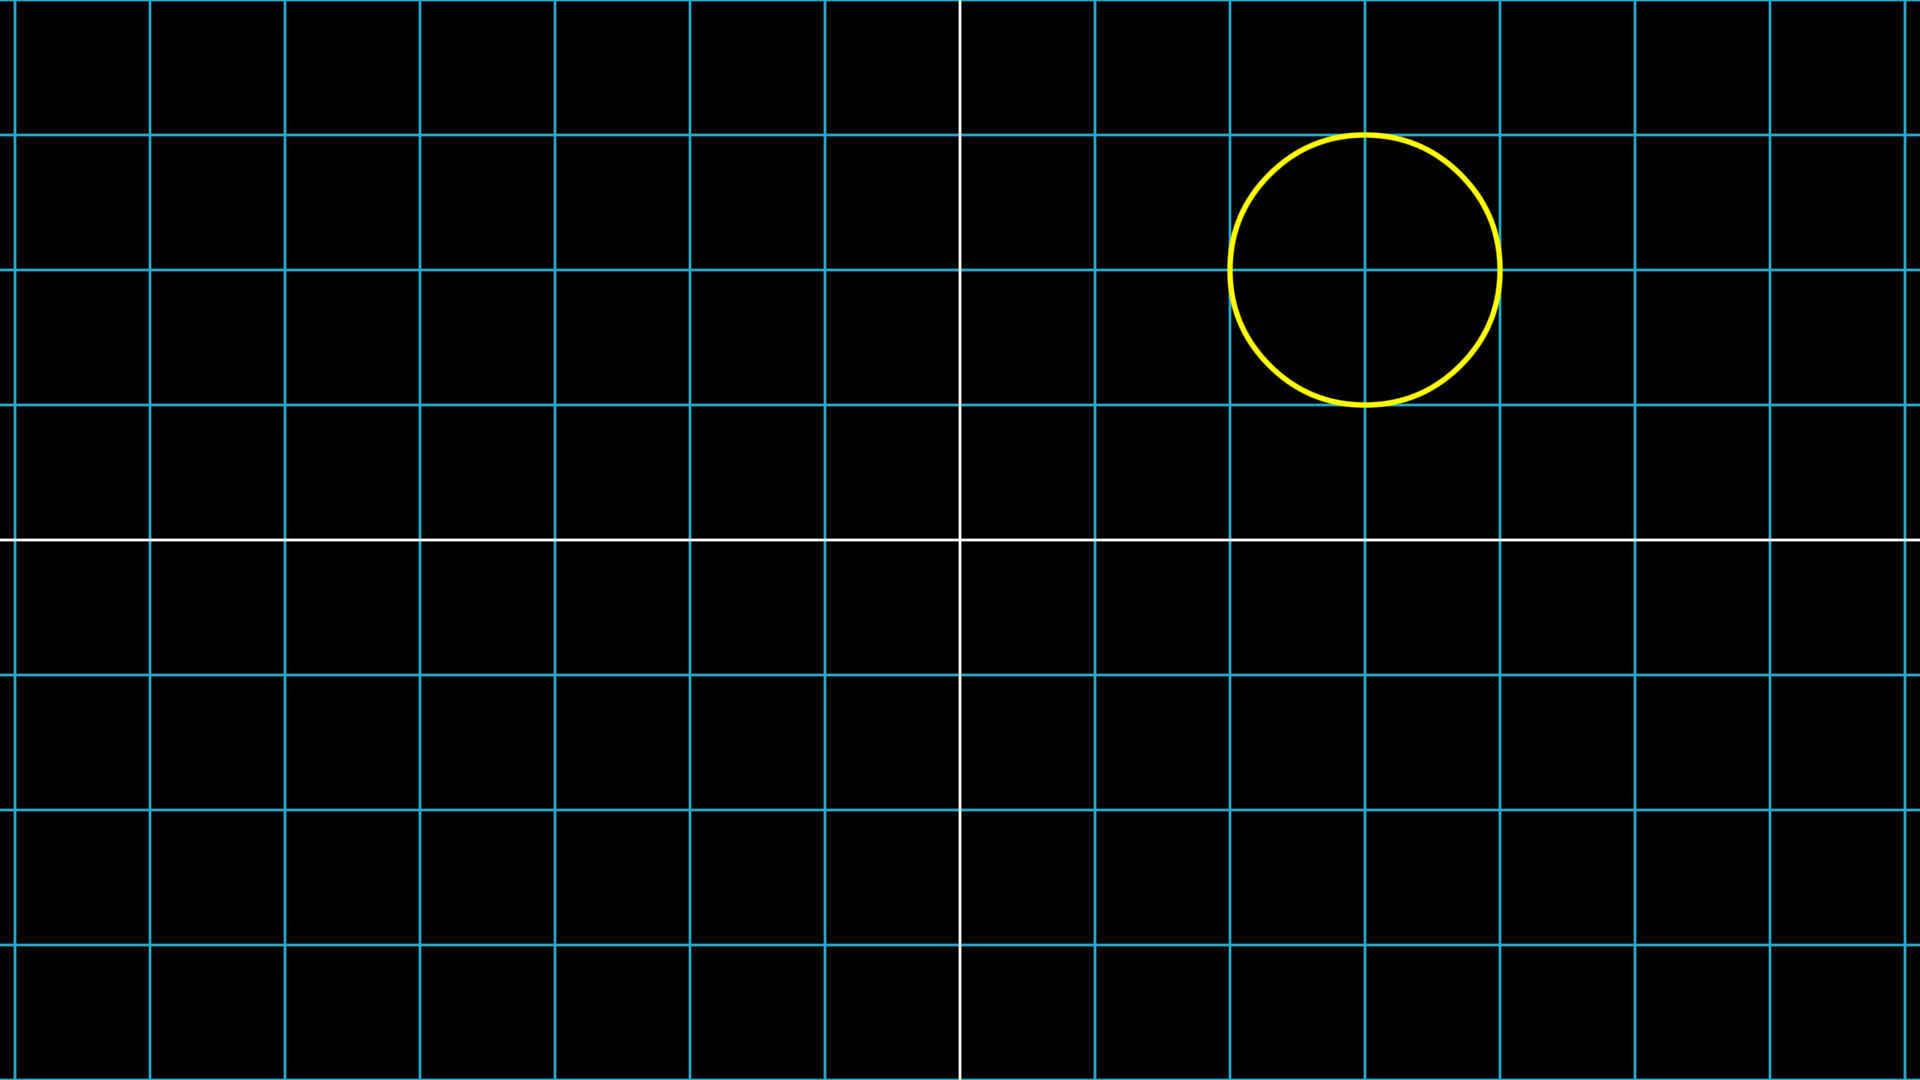
circle = Circle(color=YELLOW).show()
circle.points.move_to(RIGHT * 3 + UP * 2)
In the example above, we combined the two built-in vectors UP (upward) and RIGHT (rightward) to represent the circle’s displacement; you can also guess that there are DOWN (downward) and LEFT (leftward) built-in vectors available.
These built-in vectors make it convenient to quickly represent coordinate displacements in JAnim, just multiply the displacement distance by the direction and combine them sequentially.
JAnim also has more additional built-in directions, as shown in the figure:
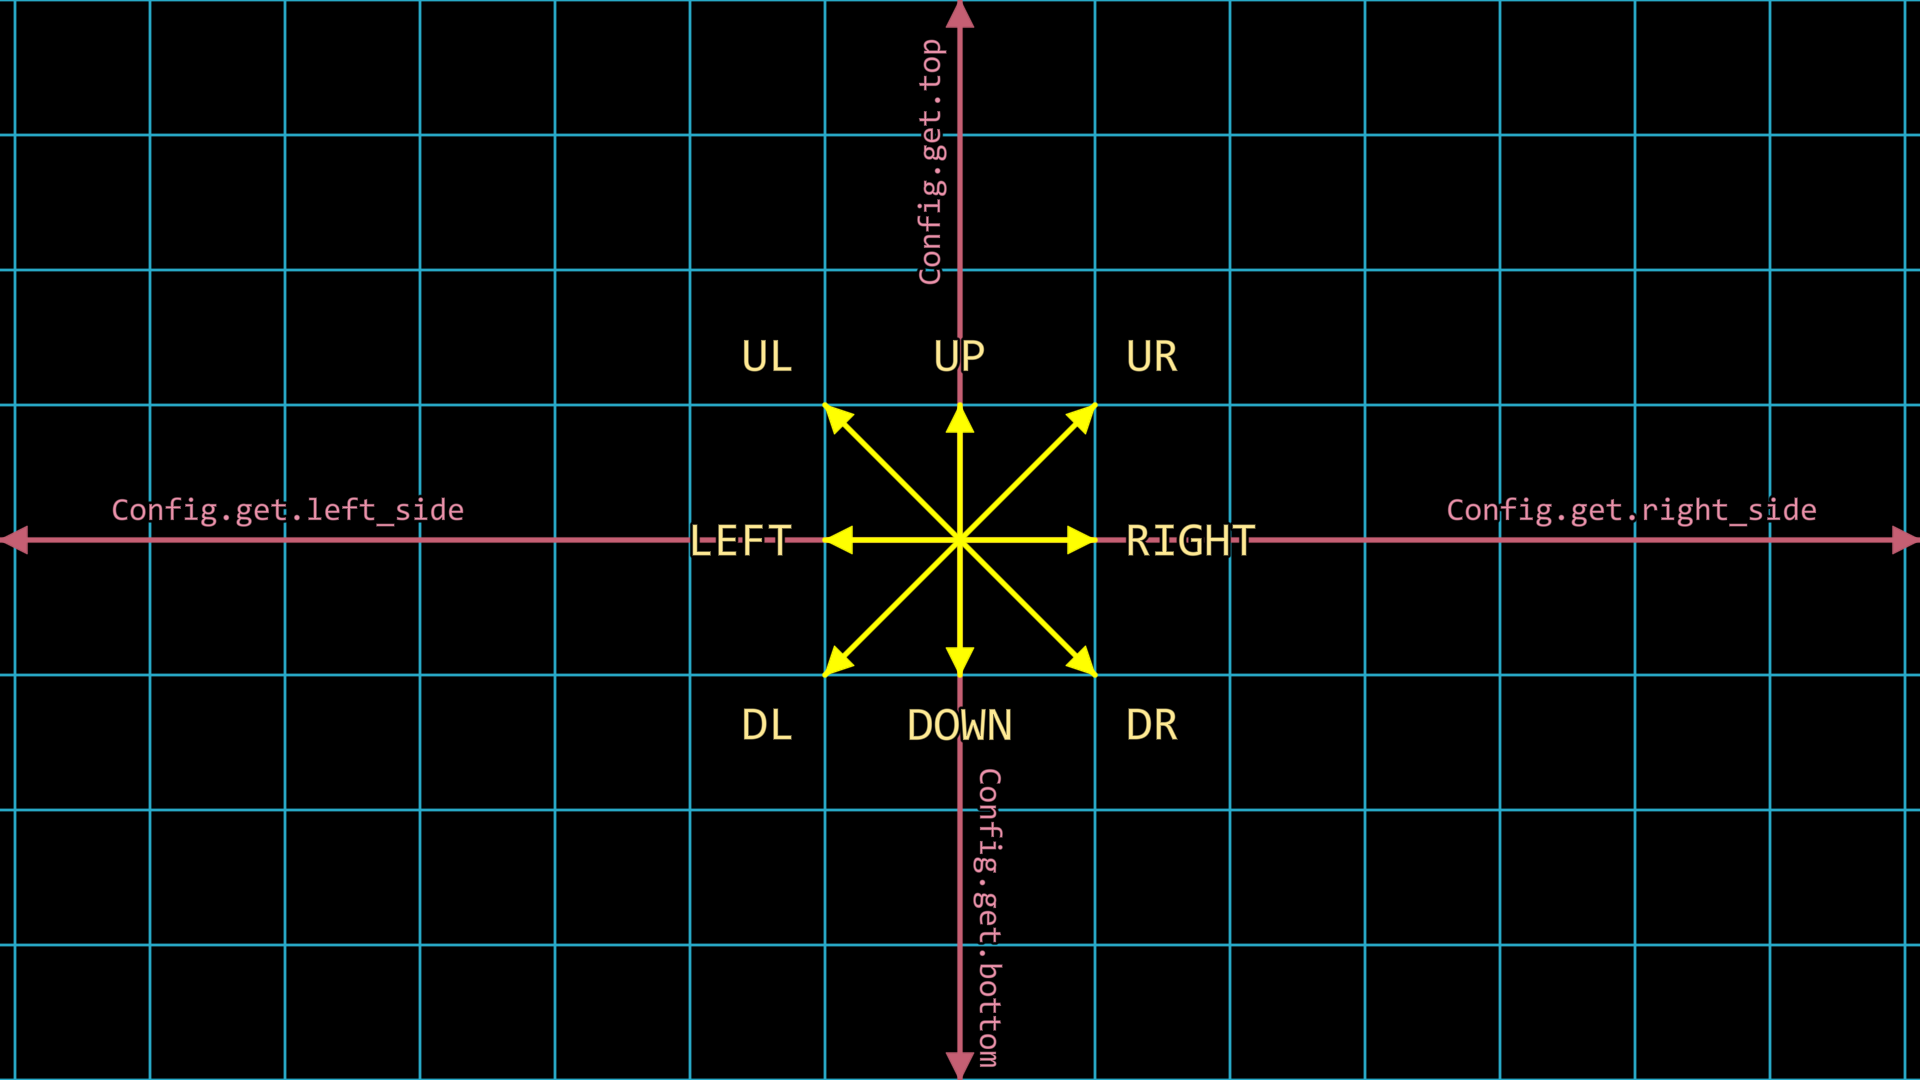
Hint
These four vectors on the edges need to be obtained using Config.get, because they are determined by the configurable frame size, not fixed vectors like unit vectors.
For more information about Config, refer to Configuration System.
In addition to using combinations of built-in directions to represent coordinates, you can also directly use coordinate values to represent positions.
For example, the aforementioned .move_to(RIGHT * 3 + UP * 2) is equivalent to .move_to([3, 2, 0]), which moves the item to position [3, 2, 0].
Important
Although we are now discussing two-dimensional coordinates on the screen, JAnim’s coordinate system is actually three-dimensional, and items and cameras can move freely in space, so a third component appears here.
But in most cases, we only need to focus on the first two coordinate axes (x and y), and set the z-axis to 0.
For more information about three-dimensional coordinates, refer to 3D Scene.
Relative Placement
In addition to the translation methods mentioned above, items can also be placed next to other items and borders:
Method |
Example |
Description |
|
Place the item next to another item |
|
|
Align the item with another item in a certain direction |
|
|
Place the item next to the border in a certain direction of the frame |
Let’s demonstrate the use of these methods with animations. Here, a circle is moved around, trying to place it next to a rectangle and next to borders:
Tip
Recall that for methods that take immediate effect like circle.points.next_to(...), inserting .anim after the item makes it a playable animation, i.e.
circle.anim.points.next_to(...)
square = Square().show()
square.points.move_to([-3, -1, 0])

circle = Circle(radius=0.5, color=YELLOW)

self.play(Create(circle))

self.play(circle.anim.points.next_to(square, RIGHT))
self.play(circle.anim.points.next_to(square, RIGHT, buff=MED_LARGE_BUFF))
self.play(circle.anim.points.next_to(square, RIGHT, buff=MED_LARGE_BUFF, aligned_edge=UP))

self.forward()

self.play(circle.anim.points.to_border(UP))
self.play(circle.anim.points.to_border(UR))
self.play(circle.anim.points.to_border(UR, buff=LARGE_BUFF))
self.play(circle.anim.points.to_border(UL))

self.forward()

self.play(circle.anim.points.align_to(square, UP))
self.play(circle.anim.points.to_border(UL))
self.play(circle.anim.points.align_to(square, LEFT))

self.forward()
Note
The animation code provided above does not include coordinate grid and text annotations when actually executed; those were added by the author separately;
And it has been slowed down for easier viewing of the animation process.
The methods in the example have some additional parameters:
buffRepresents the spacing between the item and the target item or border. Spacing from small to large can be represented by
SMALL_BUFF,MED_SMALL_BUFF,MED_LARGE_BUFF,LARGE_BUFF, or direct numerical valuesThe default spacing between items is
MED_SMALL_BUFF, and the default spacing between items and borders isMED_LARGE_BUFF.aligned_edgeRepresents the aligned edge between the item and the target item,
For example,
aligned_edge=UPin the example means placing the circle to the right of the square while aligning their top edges.
Shape Transformation
Common shape transformations include scaling and rotation:
Method |
Example |
Description |
|
Scale the item |
|
|
Stretch the item in a certain direction. |
|
|
Rotate the item, counterclockwise is the positive direction |
Let’s demonstrate the use of these methods with animations. Here, a regular hexagon undergoes several shape transformations:
poly = RegularPolygon(6).show()

self.forward()
self.play(poly.anim.points.scale(2))
self.play(poly.anim.points.rotate(PI / 6))
self.play(poly.anim.points.stretch(2, dim=0))
self.play(poly.anim.points.scale(0.25, about_edge=RIGHT))
self.play(poly.anim.points.rotate(120 * DEGREES, about_point=ORIGIN))
self.play(Rotate(poly, 120 * DEGREES, about_point=ORIGIN))
self.play(poly.anim.points.rotate(PI / 2))
self.forward()
First, for rotation operations, the values passed should be in radians. JAnim also has built-in constants for common angles, such as PI and TAU. You can also use forms like 30 * DEGREES to represent angle values, which is equivalent to PI / 6.
For some additional parameters:
about_edgeRepresents the reference edge when scaling or rotating. The default is
ORIGIN, i.e. the item’s center.For example, in
.scale(0.25, about_edge=RIGHT), the reference point for scaling is set to the right edge of the item, so that when the item is scaled down, the right edge position remains unchanged, and the rest converges toward the right edge.about_pointRepresents the reference point when scaling or rotating. Default is
None, which will take the reference point based onabout_edge, i.e. the item’s center by default;Can be set to a point, meaning to use that point in global coordinates as the reference point.
For example, in
.rotate(120 * DEGREES, about_point=ORIGIN), the reference point for rotation is set to the origin of global coordinates, making the item rotate around the origin.
self.play(poly.anim.points.rotate(120 * DEGREES, about_point=ORIGIN))
self.play(Rotate(poly, 120 * DEGREES, about_point=ORIGIN))
These two lines both appear to “rotate the item 120 degrees counterclockwise around the origin”, but there is an essential difference.
The former is a component animation of poly, essentially an interpolation effect of poly before and after the operation. It is a linear transformation rather than arc movement, and does not have a true rotation effect;
While the latter Rotate is a specialized animation class that makes the item rotate along an arc path, producing a true rotation effect.
Also refer to the introduction on the rotation page.